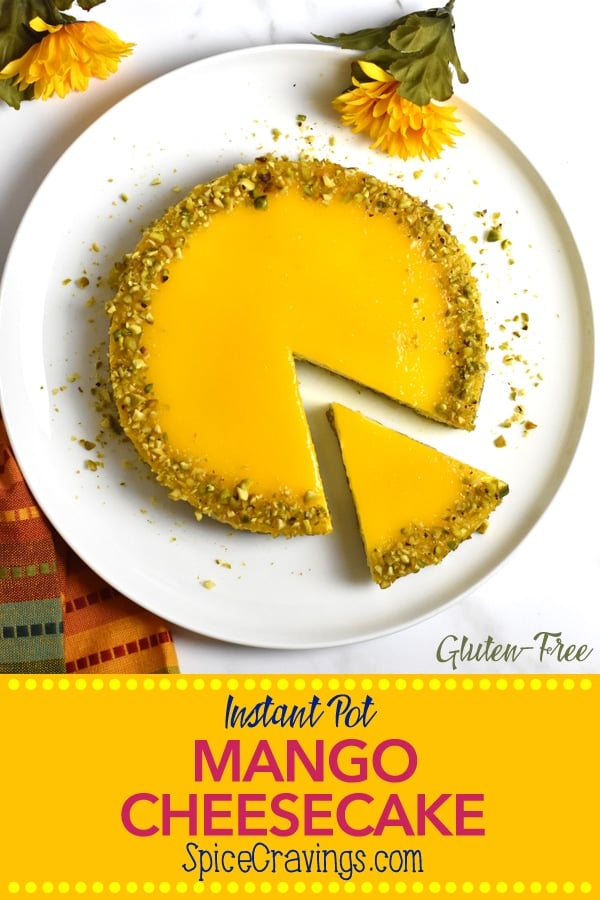
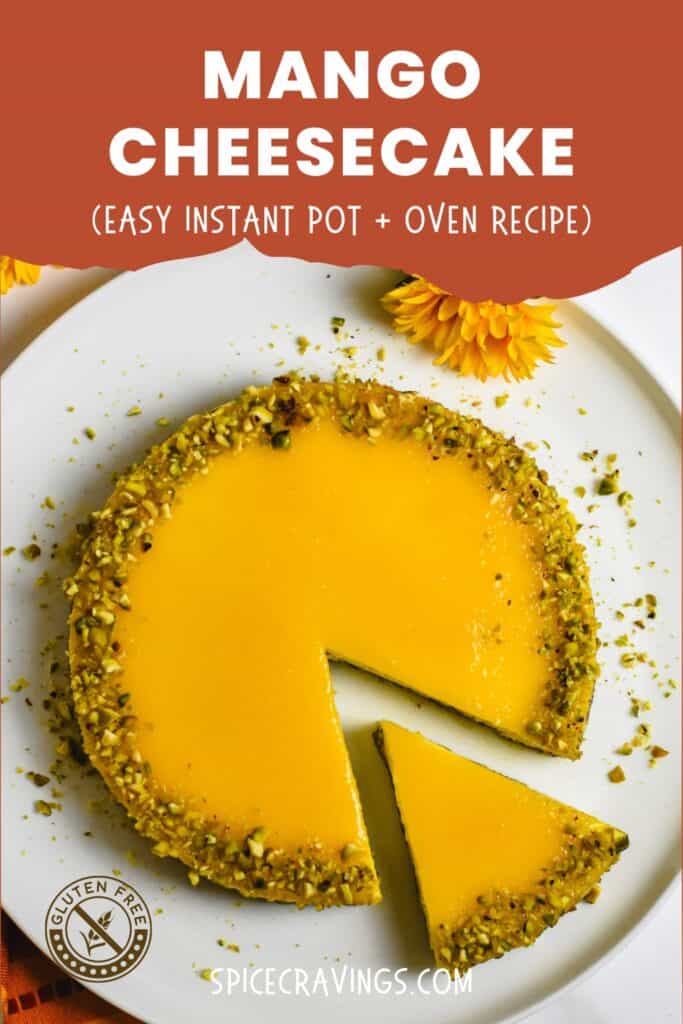
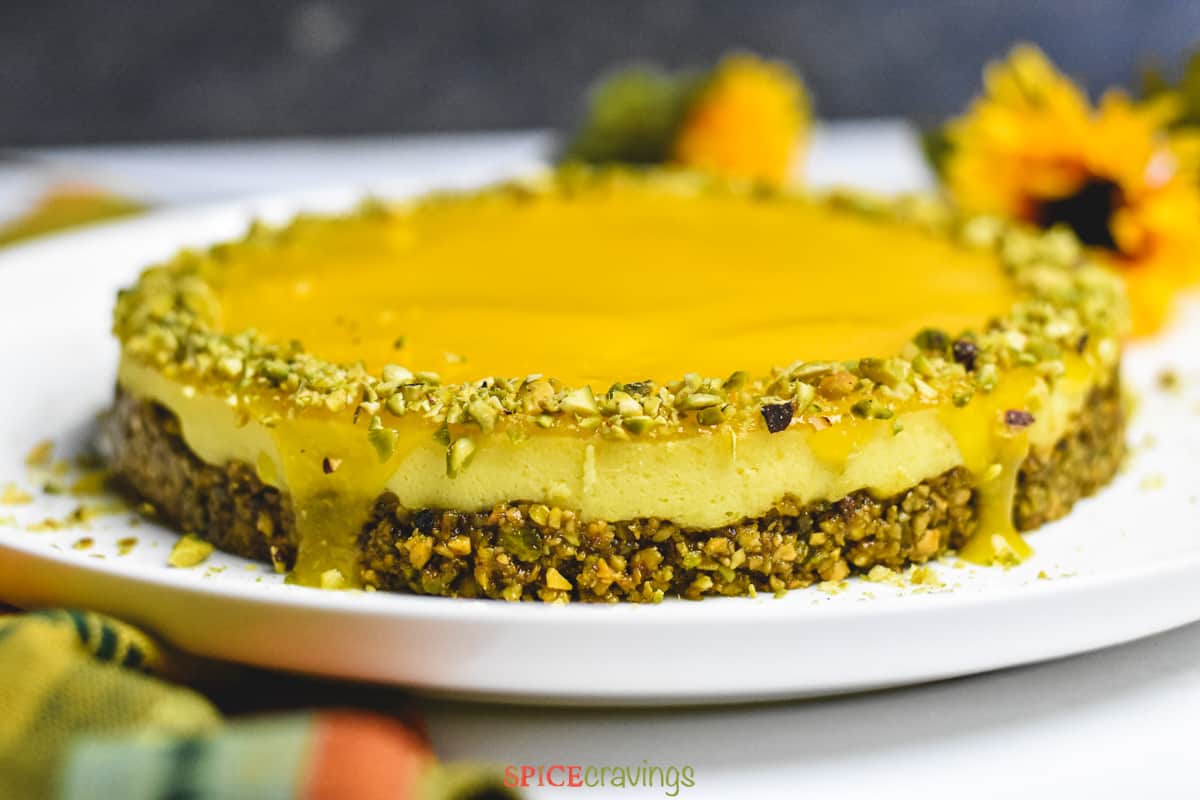
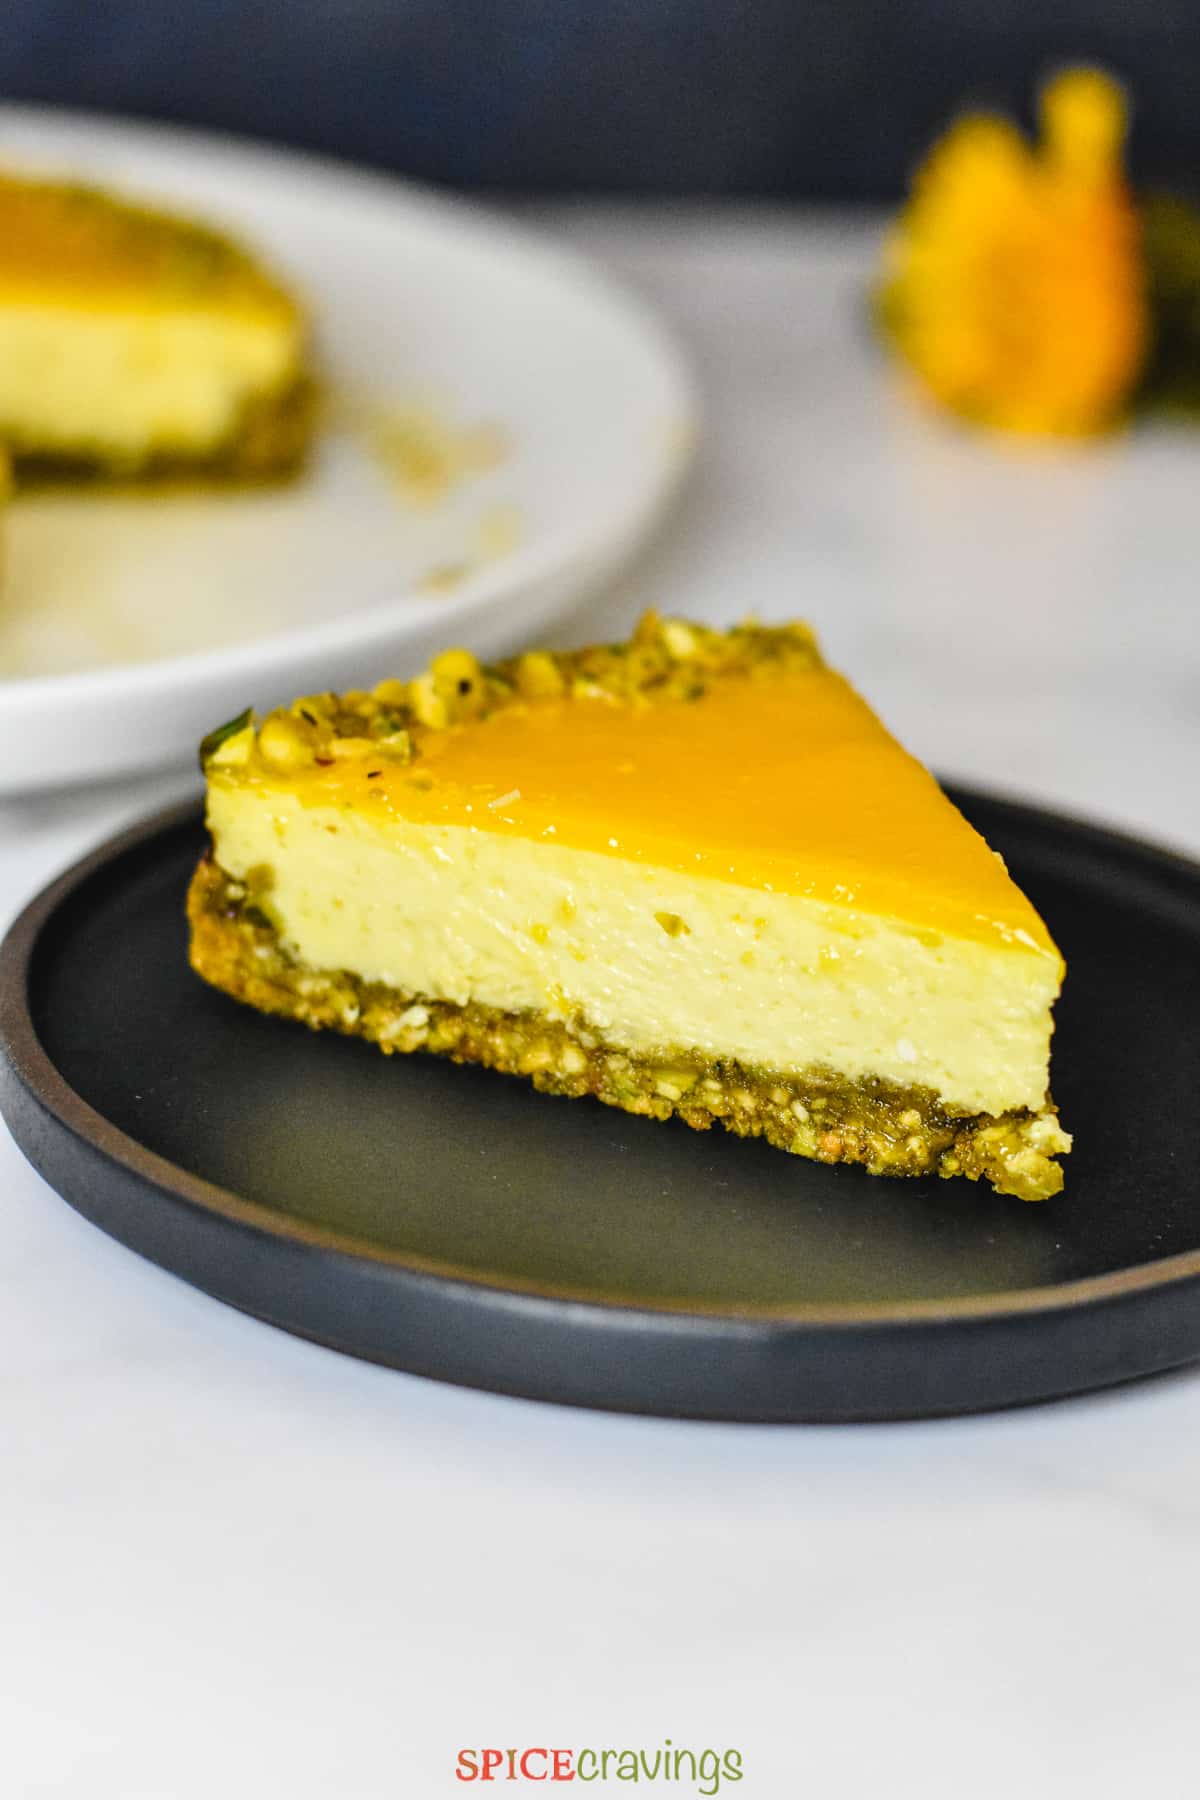
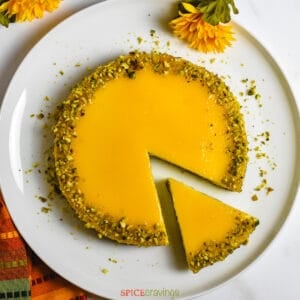
If you love mangoes and cheesecake, this creamy and fruity Mango Cheesecake will blow your mind. Sweet mangoes blended with rich cream cheese filling, poured on a gluten-free pistachio & cardamom crust, then baked in the Instant Pot until set and ready to chill. This hands-off recipe makes the best mango cheesecake!
Want to save this recipe?
Jump to:
This luscious Mango Cheesecake is a must-have during my Indian dinner parties or Diwali get-togethers. It's the perfect make-ahead dessert that actually tastes more delicious the following day.
This velvety-smooth masterpiece combines the creamy goodness of a traditional cheesecake with the exotic essence of mangoes, pistachios, and cardamom.
What is Mango Cheesecake
Mango cheesecake is a delectable fusion dessert that combines the creaminess of a traditional cheesecake with the tropical sweetness of ripe mangoes.
In this recipe, I replaced the traditional graham cracker crust with crushed pistachios making this cheesecake gluten-free. Let's get started on this irresistible mango dessert!
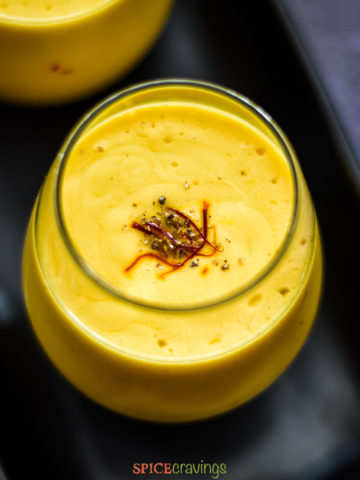
Another Popular Mango Dessert: Mango Kulfi
Ingredients - Notes & Substitutions
You'll need the following ingredients for the crust, filling, and topping:
- Pistachio: Use unsalted, raw-shelled pistachios for the crust as well as topping.
- Butter: use unsalted butter and remove it from the fridge 30 minutes ahead of prepping so it can come to room temperature.
- Brown Sugar: gives the crust a little extra sweetness and helps bind the crust.
- Cardamom: Just a little bit of cardamom gives the crust a floral aroma and taste.
- Cream cheese: We need an 8-ounce block of full-fat cream cheese. I prefer the Philidelphia brand for its consistent and rich flavor.
- Mango Puree: Pick ripe, sweet mangoes that are non-fibrous. I prefer to use Altaufo or Indian Alphonso Mangoes to make a smooth puree. If the mangoes are fibrous, strain the puree through a sieve.
- Cornstarch: This helps thicken the filling slightly and also acts as a binding agent.
- Egg: We need an egg as our primary binding agent to help set the cheesecake. See eggless substitutions below.
- Sugar & Salt: Regular granulated sugar along with a pinch of salt to balance the flavors.
- Saffron: We need just 8-10 saffron strands soaked in a tablespoon of hot water to release their aroma and a gorgeous crimson hue.
- Confectioner's sugar: This is also labeled as powdered cane sugar in some stores. This helps thicken the topping and form a rich glaze for the cheesecake.
Scroll to the recipe card for a detailed list of ingredients and quantities.
Variation: Eggless Mango Cheesecake
For my friends and readers who don't eat eggs, I've got you covered. Simply skip the egg, and add another ½ tablespoon of cornstarch, which makes a total of 1.5 tablespoons of cornstarch for this recipe.
How to Make Mango Cheesecake
Here are the step-by-step directions and photos for a super easy and delectable Instant Pot mango cheesecake:
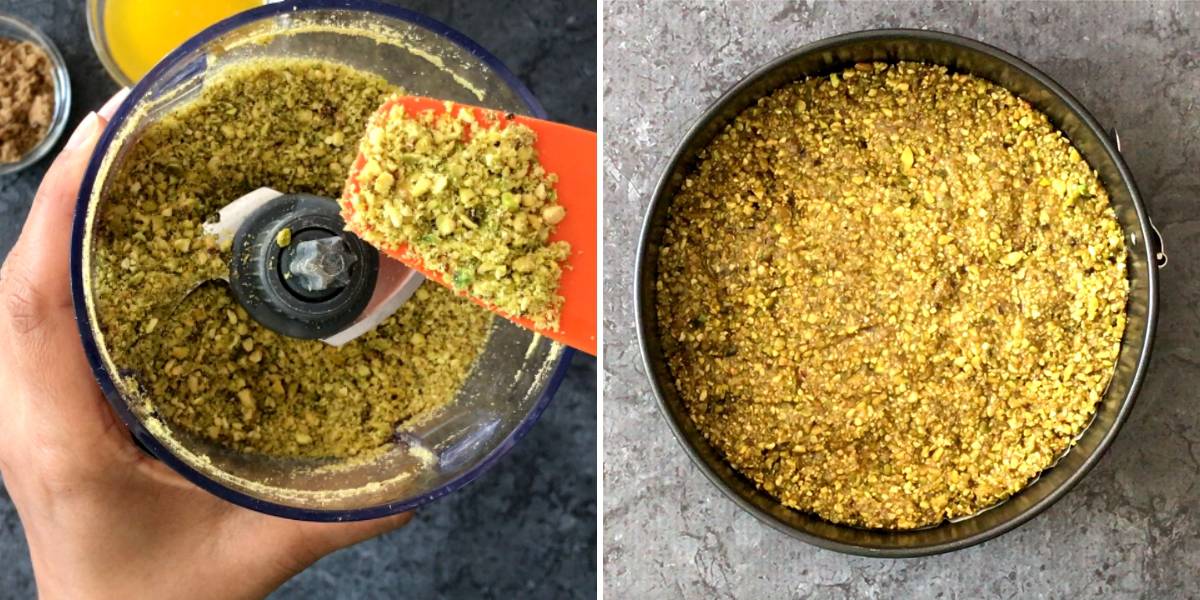
Step 1: Make the Crust
Pulse together shelled pistachio and cardamom in a small food processor till it's ground to your preferred consistency. I like it medium-fine, so about 8-10 pulses work for me.
Combine pistachio crumbs, sugar, and butter. Grease a 7-inch springform pan then line it with a parchment round.
Pour the pistachio mix in and press it down firmly at the bottom to form an even layer. Put the pan in the freezer, while you make the filling.
Step 2: Prepare the Filling
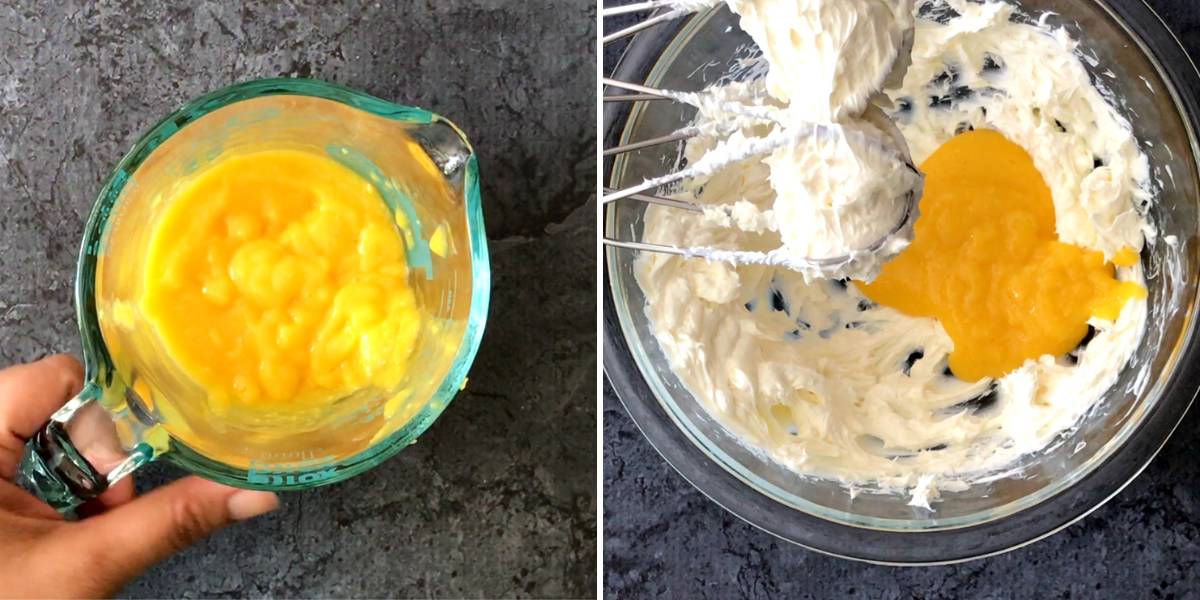
Take 1 cup of mango chunks and blend them such that you get about ¾ cup of mango puree. If using canned mango puree, skip this step.
In a large bowl, beat cream cheese on low speed, until fluffy (about 45 seconds). Gradually mix in mango pulp, sugar, cornstarch, and saffron water (no strands). Blend it for 30-45 seconds.
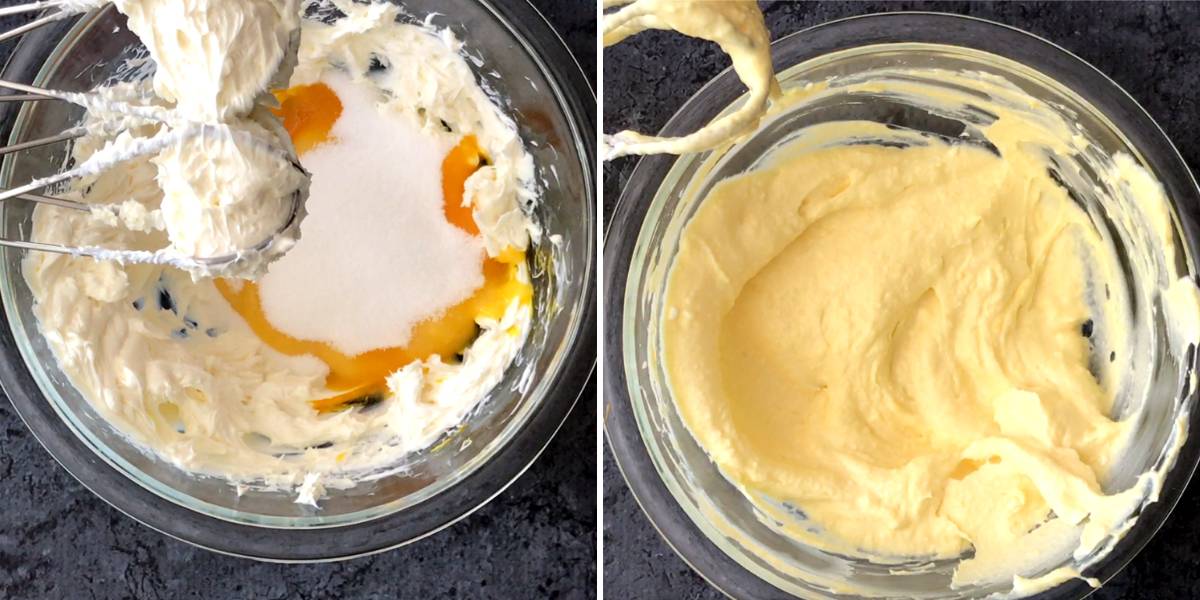
Add an egg and blend for another 30-40 seconds, until fully incorporated.
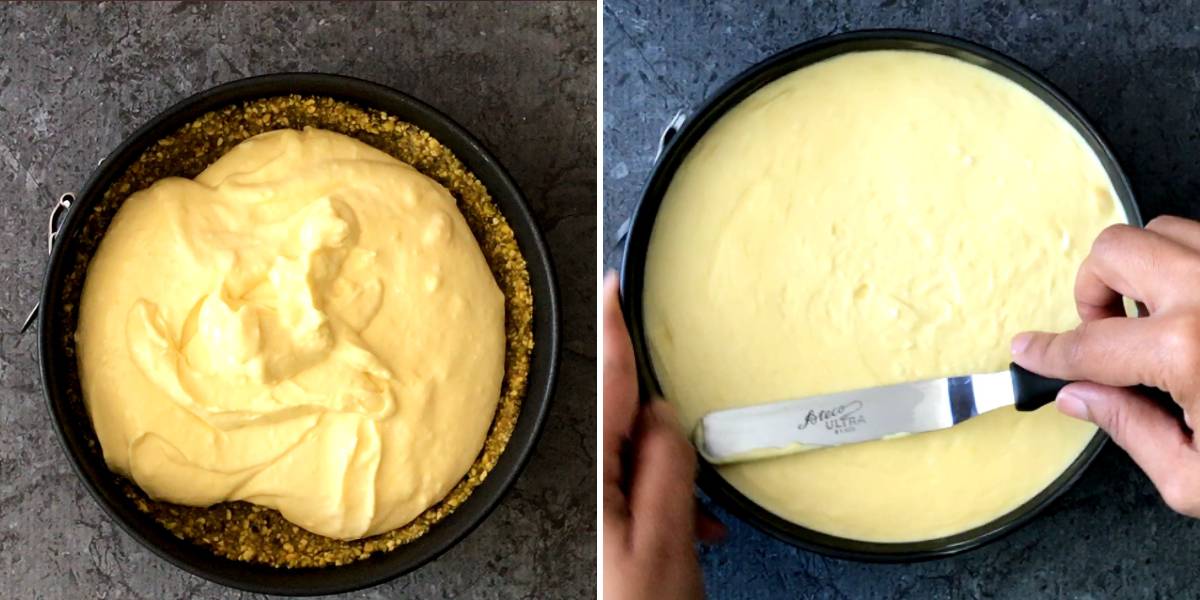
Pour the filling into the prepared pan. Spread the filling evenly, using a spoon or an offset spatula. If you see bubbles in the filling, break them with a knife or a fork and even out the filling. Cover the pan with aluminum foil.
Step 3: Pressure Cook Cheesecake
Turn on the Instant Pot and add water to the cooking pot. Place the cake pan on the trivet and lower it down in the Instant Pot. Close the lid and select Pressure Cook for 30 mins at high pressure.
Allow for 20 minutes of natural release after cooking is done (NPR). Release the remaining pressure and open the lid after the pin drops. Remove the pan and take off the aluminum foil.
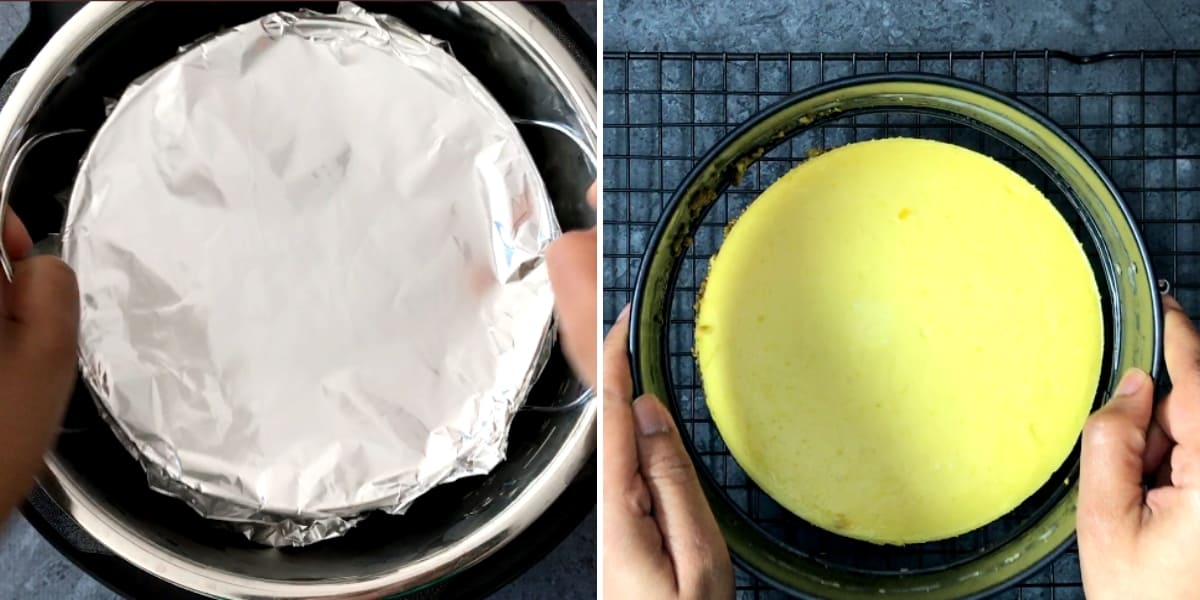
Let the cheesecake rest on the counter for about 30 minutes. After that, using a butter knife or offset spatula, go around the edges of the cheesecake, releasing the cheesecake from the pan.
Carefully, open the springform hook. Remove the ring and let the cheesecake cool down for another hour.
Step 4: Mango Topping
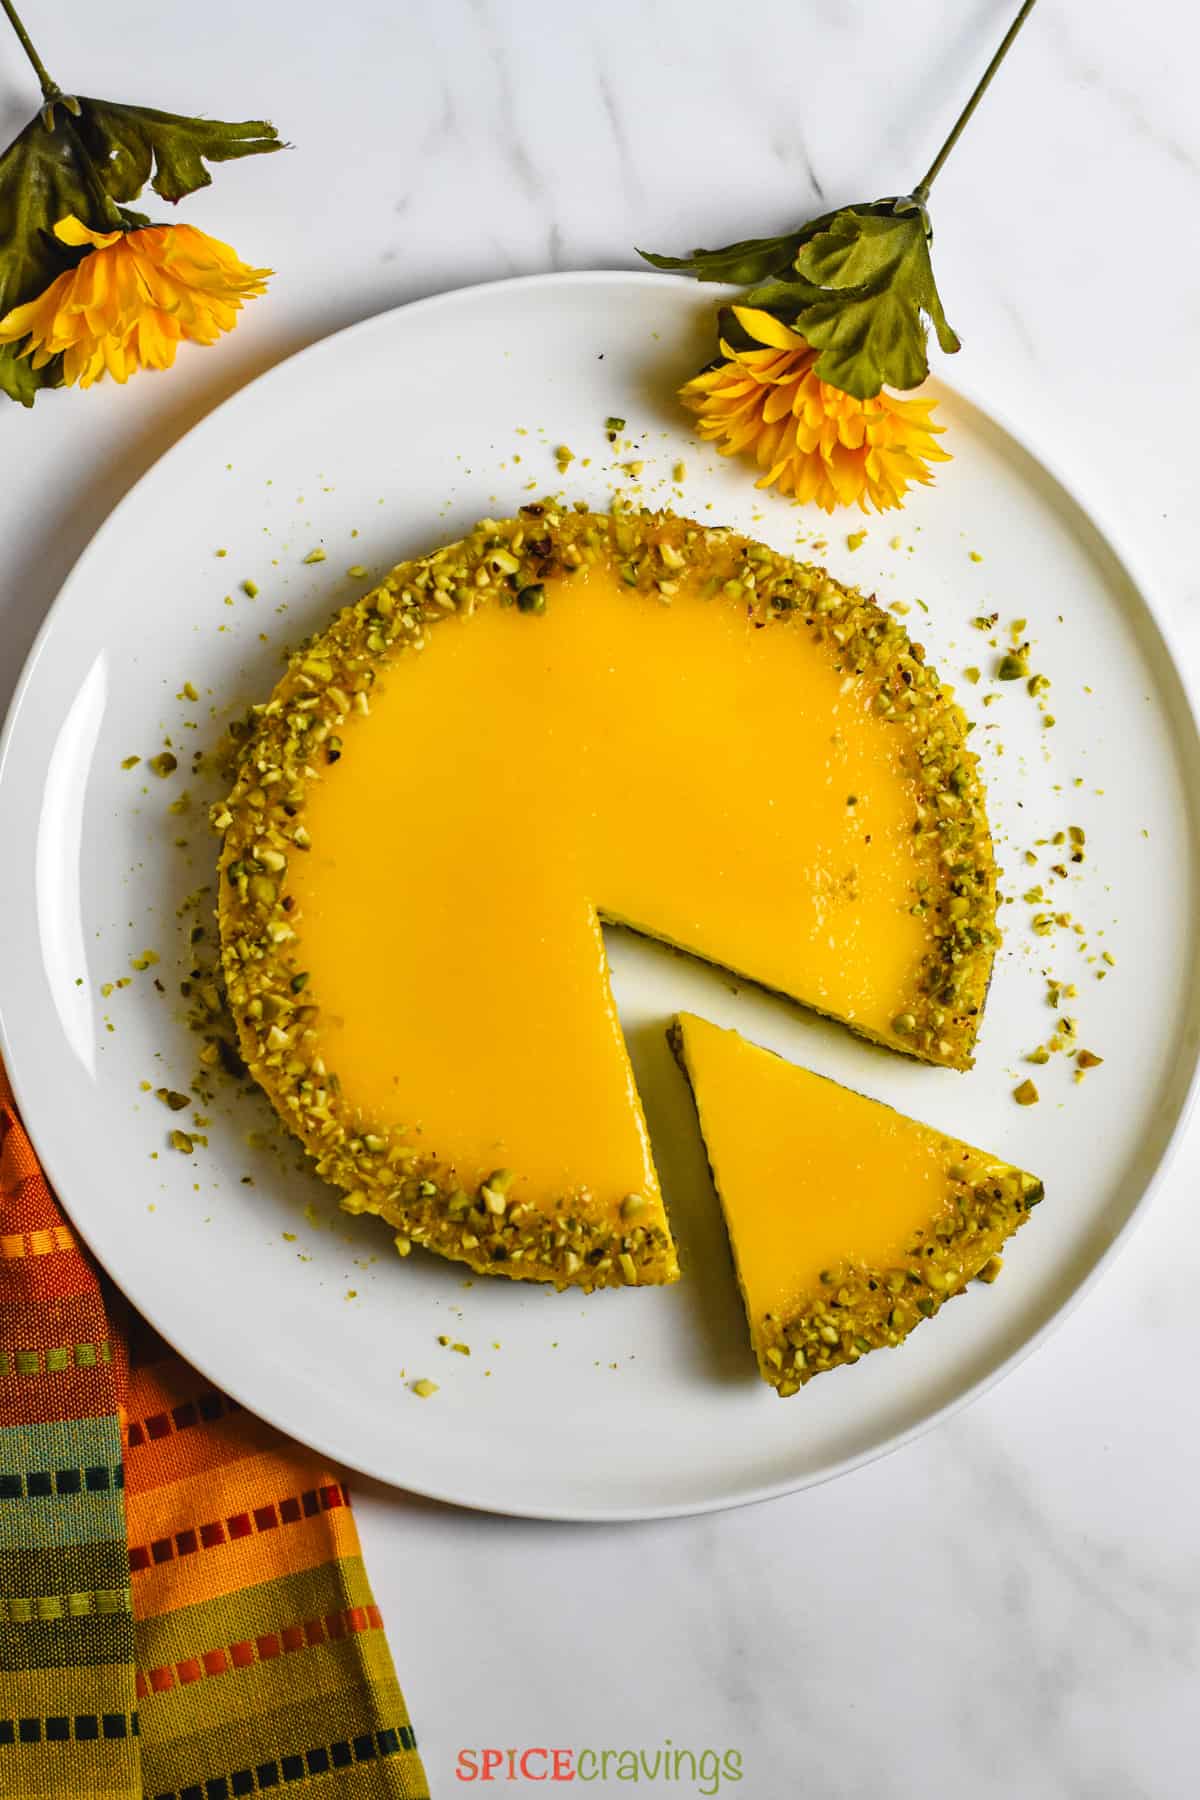
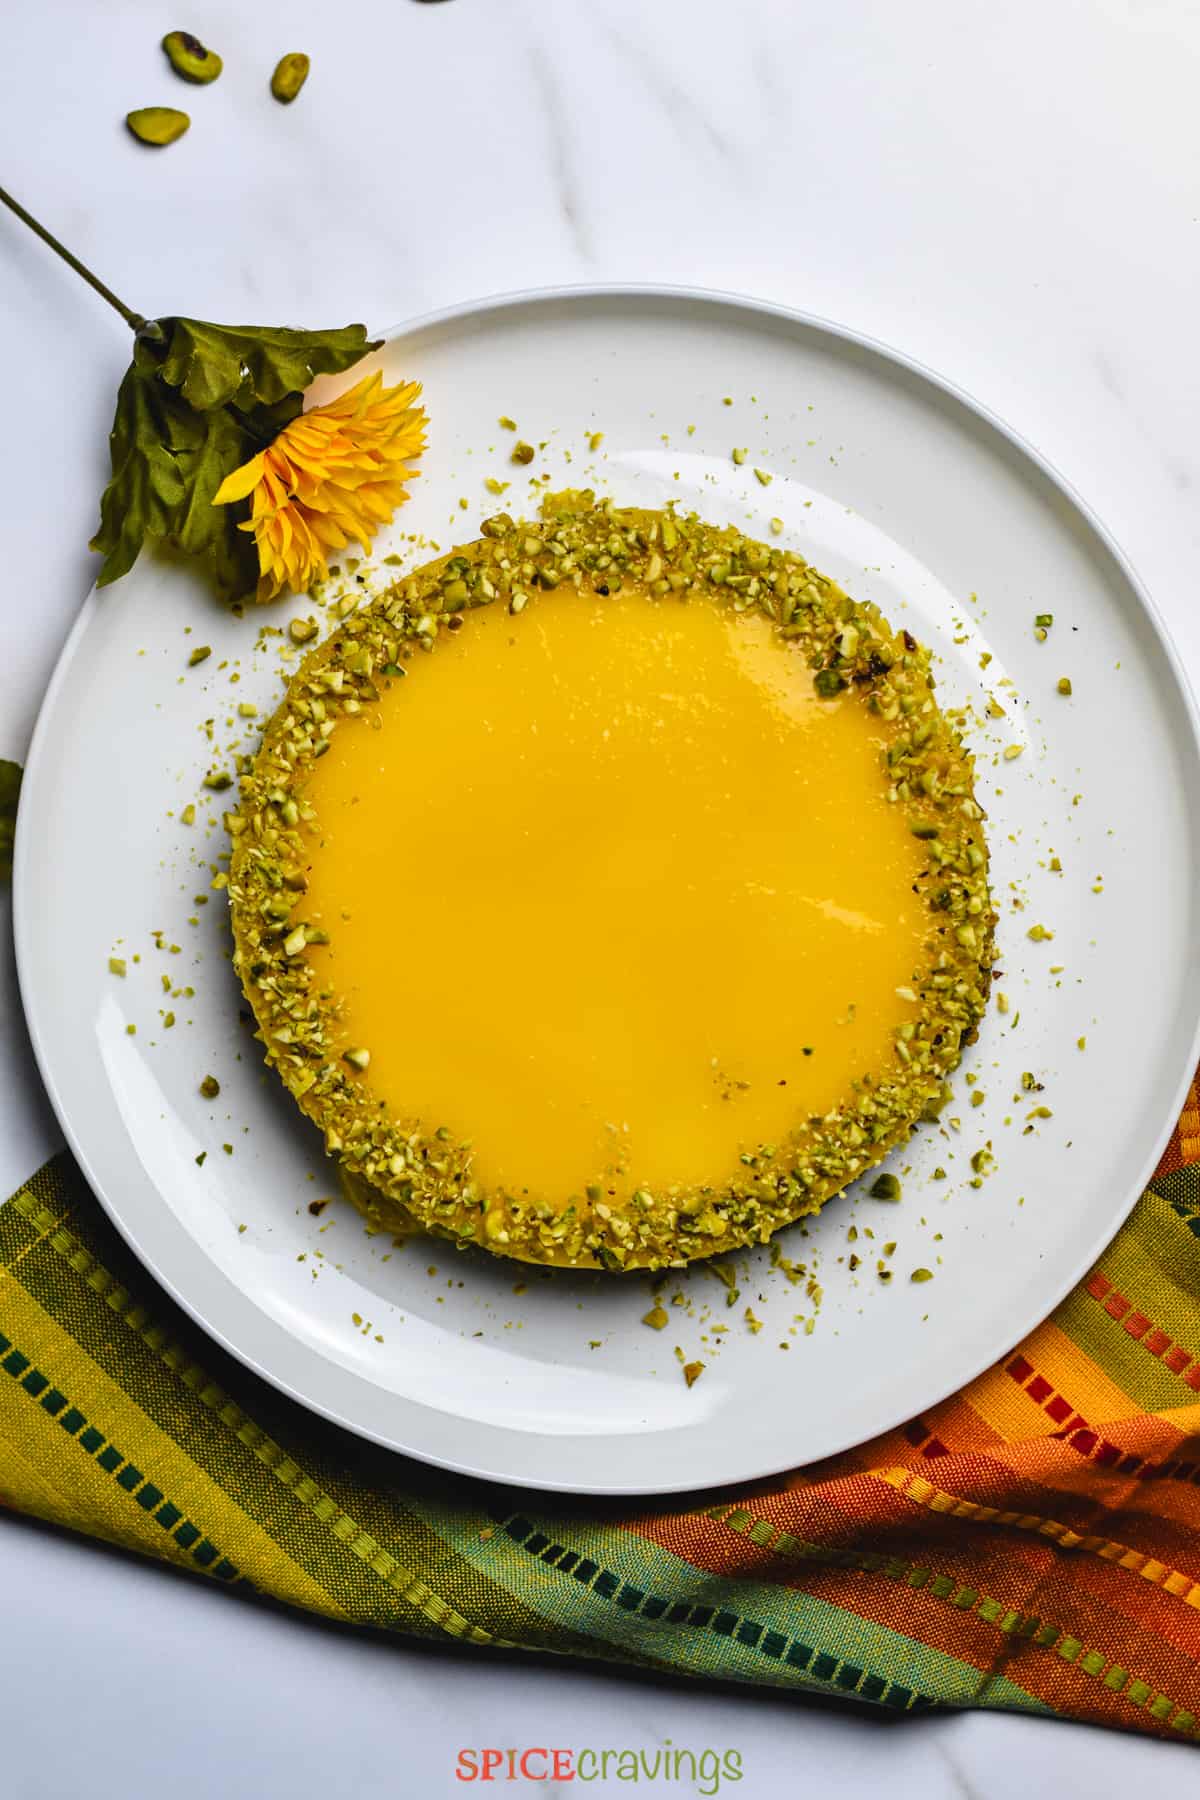
Whisk together the remaining mango puree and confectioners sugar. Pour over the cheesecake and spread evenly using an offset spatula.
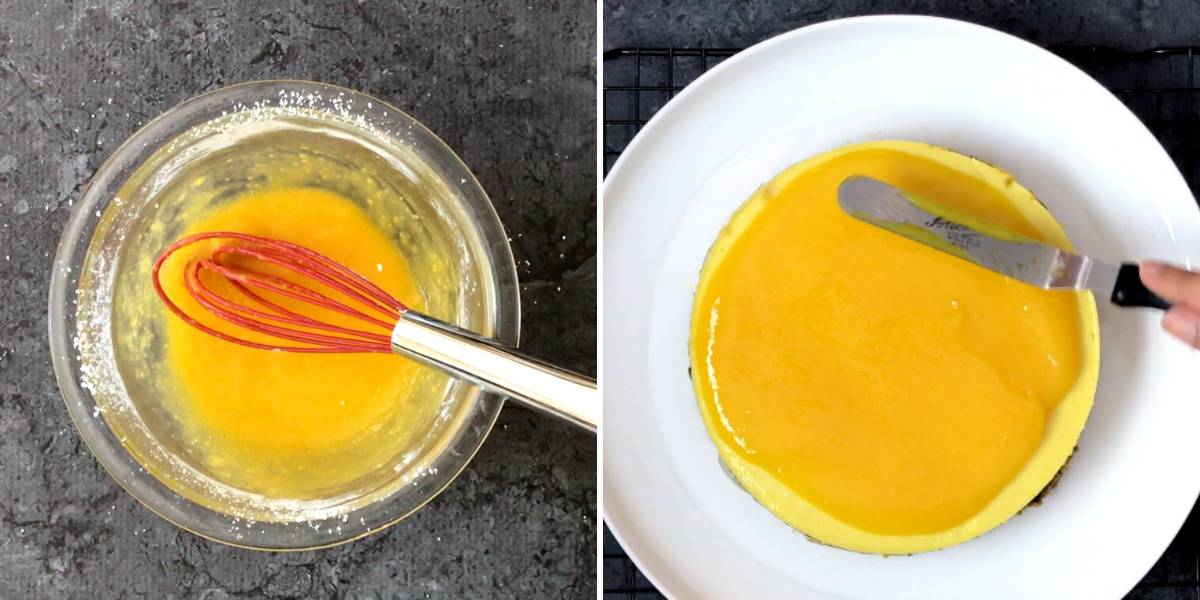
Sprinkle crushed pistachios around the edges for an enhanced look and texture. Refrigerate overnight or at least 8 hours before serving.
Alternate Method: Oven-Baked Cheesecake
If you don't have an Instant Pot or simply want to bake this cheesecake in the oven, here are the detailed instructions.
The important thing to remember when baking a cheesecake in the oven is to bake it in a hot water bath. That helps in cooking the cheesecake evenly and prevents it from cracking.
- Preheat oven to 350°F. Assemble the cheesecake following the directions above. Wrap the bottom half of the pan with aluminum foil to prevent the water from getting into the cake pan. If needed, double-wrap it.
- Place the prepared cheesecake pan inside a large baking dish (like a lasagna pan). Carefully pour 2 cups of hot water into the dish (around the cheesecake). 'Loosely' tent the cheesecake with aluminum foil to prevent over-browning.
- Place the roasting pan in the middle rack of the oven. Bake for 45 min to an hour, until the cake edges have set and the center of the cake is a bit jiggly.
- Turn the oven off and open the oven door slightly. Let the cheesecake sit in the oven for 1 hour. After that, remove it and cool it completely for another hour before refrigerating it.
Serving Suggestions
This mango-flavored cheesecake tastes best when served chilled, so keep it refrigerated until ready to serve.
Even though it doesn't need any accompaniments, you can elevate the taste by adding a variety of delightful toppings. Here are some of my tried and tested combinations:
- Consider garnishing each slice with fresh mango slices or cubes to enhance the mango flavor.
- A drizzle of mango coulis or a sprinkle of toasted coconut can add extra visual appeal and taste.
- For a refreshing contrast, serve with a dollop of whipped cream.
Recipe Tips & Notes
Here are some tried and tested tips for a smooth and crackles mango cheesecake:
- Room temperature ingredients: This easy cheesecake recipe turns out awesome if all ingredients are at room temperature. It may take a bit of planning ahead, but believe me, it's worth it.
- Mango Puree: For consistent results, I recommend using fresh mango puree as canned puree tends to be more watery. If your mangoes are fibrous, strain the puree through a sieve for a smooth cheesecake batter. If using frozen mango chunks, thaw them completely before pureeing them.
- Don't over-mix the batter: In the video and instructions, you'll notice that my blending times are quite precise. The purpose of that is to ensure that we don't over-mix the batter. Over-mixing will create more air bubbles in the batter, which will result in an uneven cheesecake filling.
- Don't overcook it: A cheesecake is cooked perfectly when the outer edges look firm and set, and the center has a slight jelly-like jiggle. The center finishes setting while it cools. Cooking it any longer may result in a cracked cheesecake.
- Pan size and timing: I have tested this recipe many times, so please follow the recommended pan size (7-inch springform pan), and the whipping time for great results.
- Cool it gradually and then chill it: Last, but probably a very important tip is to let the cheesecake sit on the counter for a few hours to cool down gradually. Then, chill it overnight, or at least 8 hours for best results.
Frequently Asked Questions
Mango cheesecake is typically made from a mixture of cream cheese, mango puree, sugar, eggs, and the crust usually consisting of crushed graham crackers or nuts.
New York cheesecake is characterized by its dense, creamy texture and rich flavor due to the addition of extra cream and egg yolks, while regular cheesecake refers to the broader category of cheesecakes with varying textures and flavors.
You can peel and chop mangoes following the detailed instructions in this post: How to Peel u0026 Cut a Mango.
Cheesecake can be either baked or no-bake, with baked versions containing eggs and offering a denser texture and deeper flavor, while no-bake versions are typically lighter and creamier and no not contain eggs.
Popular Mango Recipes on the Blog
The following recipes are part of the Mango Recipes Collection:
📖 Recipe
Mango Cheesecake Recipe
Want to save this recipe?
Video
Equipment
Ingredients
Crust (gluten-free)
- ¾ cup pistachio shelled
- 2 tablespoon butter melted
- 2 tablespoon brown sugar (regular sugar ok too)
- ½ teaspoon ground cardamom 6-8 cardamom pods
Cheesecake Filling
- 8 ounce cream cheese
- ¼ cup mango puree
- 1 tablespoon cornstarch
- ⅓ cup cane sugar
- 1 pinch salt
- 8-10 saffron strands soaked in 1 tablespoon warm water
- 1 egg (For egg substitute, read content above)
Topping
- ½ cup mango puree
- ¼ cup confectioners sugar (powdered sugar)
- 3 tablespoons pistachio shelled
Instructions
Crust:
- Pulse together shelled pistachio and cardamom in a small food processor till it is ground to your preferred consistency. Reserve 3 tablespoons for the topping and set that aside. I like it medium-fine, so about 8-10 pulses work for me.
- Combine pistachio crumbs, sugar, and butter. Grease a 7-inch springform pan and line it with a parchment round. Pour the pistachio mix in and press it down firmly at the bottom to form an even layer. Put the pan in the freezer, while you make the filling.
Filling:
- Take 1 cup of mango chunks and blend them such that you get about ¾ cup of mango puree. If using canned mango puree, skip this step.
- In a large bowl, beat cream cheese on low speed, until fluffy (about 45 seconds). Gradually mix in sugar, cornstarch, saffron water (preferably without the strands), and mango pulp. Blend for 30-45 seconds. Add egg and blend for another 30-40 seconds, until fully incorporated.
- Pour into prepared pan. Spread the filling evenly, using a spoon or an offset spatula. If you see bubbles in the filling, break them with a knife or fork and even out the filling. Cover the pan with aluminum foil.
Baking/Cooking:
- Plug in the Instant Pot. Pour in 1 cup water (1½ for 8qt). Place the cake pan on the trivet and lower it down in the Instant Pot. Close the lid and select Pressure Cook for 30 mins at high pressure.
- When the cooking time is done, let the pressure release naturally for 20 minutes. Release the remaining pressure by using your cooker's quick-release instructions. Open the lid after the pin drops.
- Remove the pan and take off the aluminum foil. Let the cheesecake rest on the counter for about 30 minutes. Using a butter knife or offset spatula, go around the edges of the cheesecake, releasing the cheesecake from the pan. Carefully, open the springform hook. Remove the ring and let the cheesecake cool down for another hour.
Topping: This is an optional step but HIGHLY recommended
- Whisk together the remaining mango puree and confectioners sugar. Pour over the cheesecake and spread evenly using an offset spatula. Sprinkle crushed pistachios around the edges for an enhanced look and texture. Refrigerate overnight or at least 8 hours before serving.
Notes
- Room temperature ingredients: This easy cheesecake recipe turns out awesome if all ingredients are at room temperature. It may take a bit of planning ahead, but believe me, it's worth it.
- Mango Puree: For consistent results, I recommend using fresh mango puree as canned puree tends to be more watery. If your mangoes are fibrous, strain the puree through a sieve for a smooth cheesecake batter. If using frozen mango chunks, thaw them completely before pureeing them.
- Don't over-mix the batter: In the video and instructions, you'll notice that my blending times are quite precise. The purpose of that is to ensure that we don't over-mix the batter. Over-mixing will create more air bubbles in the batter, which will result in an uneven cheesecake filling.
- Don't overcook it: A cheesecake is cooked perfectly when the outer edges look firm and set, and the center has a slight jelly-like jiggle. The center finishes setting while it cools. Cooking it any longer may result in a cracked cheesecake.
- Pan size and timing: I have tested this recipe many times, so please follow the recommended pan size (7-inch springform pan), and the whipping time for great results.
- Cool it gradually and then chill it: Last, but probably a very important tip is to let the cheesecake sit on the counter for a few hours to cool down gradually. Then, chill it overnight, or at least 8 hours for best results.


Envy says
I made this cheesecake in the conventional oven today and it looks great, am sure it will taste great when we eat today evening. I used canned mango pulp. Thanks for the recipe, Aneesha!!!
Aneesha says
Hi Envy, You're most welcome, I hope you enjoyed it!
Santoshi says
Can we make this in normal pressure cooker?
Aneesha says
Hi Santoshi, I'm sure you can but since I've never tried it, I'm afraid I can't give you any guidance on time. If you have an oven, you can follow the baking directions in this recipe.