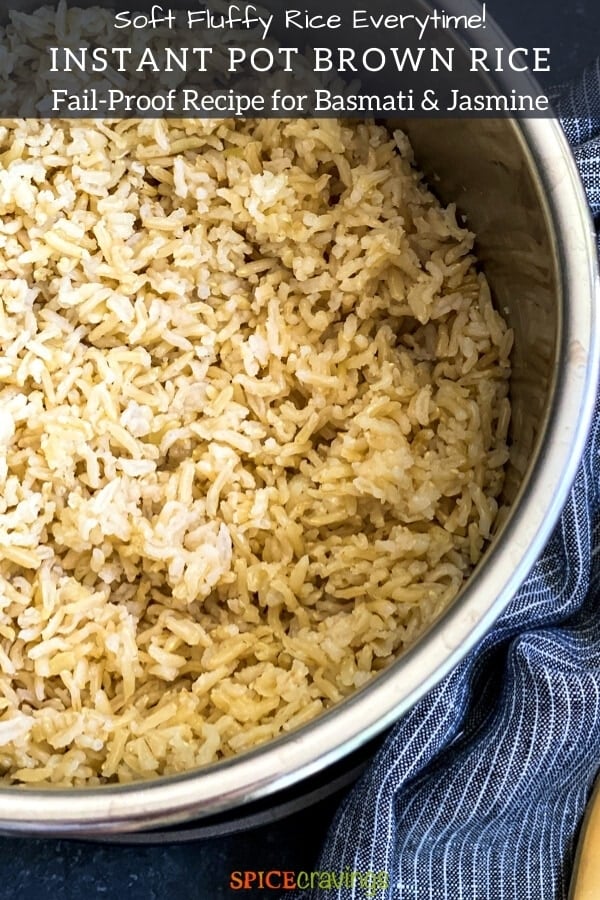
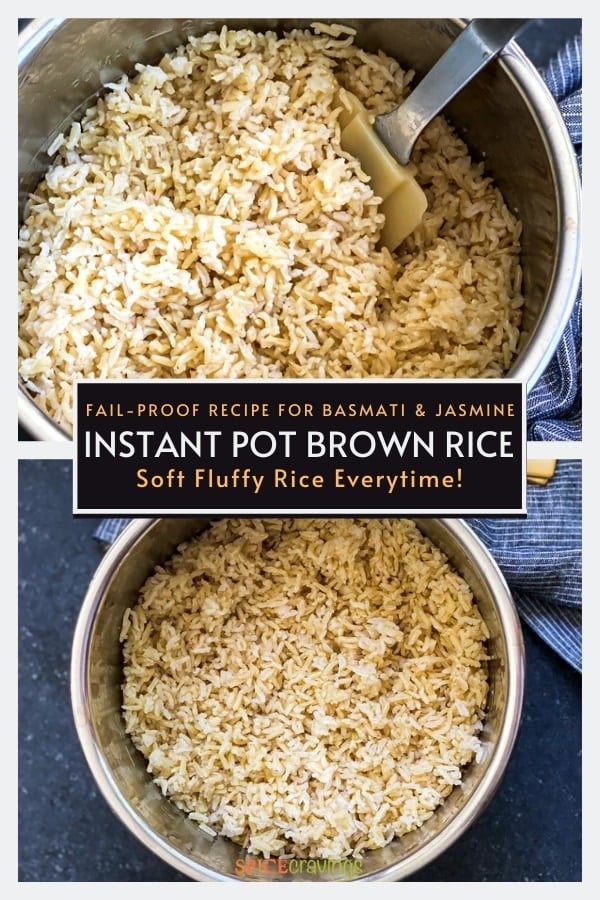
Learn how to perfect Instant Pot Brown Rice in this simple, informative guide that teaches you how to make soft and fluffy long-grain brown rice every time. It's a wonderful base recipe for rice you can use for sides, meal prep and more.
Want to save this recipe?
All-Purpose Whole-Grain Side Dish
Rice is a prominent ingredient in our meals. We enjoy it for lunch, dinner, even dessert when the occasion calls for it. And while we are big fans of traditional white rice, brown rice has become our go-to grain of choice.
Because we eat it so often, I have mastered my brown rice craft . All it takes is a little bit of know-how and an Instant Pot pressure cooker to make an all-purpose whole-grain side dish with soft and tender grains every single time. (Say goodbye to uncooked, overcooked, burnt or mushy rice)
I make brown rice at least once a week, and here's why I love this recipe:
- Brown rice is a richer source of vitamins, minerals, antioxidants and fiber.
- The Instant Pot provides the same gentle heat as a rice cooker, resulting in even cooking.
- It offers two cooking methods depending on my needs - Main Pot or Pot-in-pot cooking
- Multiple tests have allowed me to discover the perfect rice-to-water ratio
- It's a set-it-and-forget-it, hands-free recipe
- Its a staple for meal prep (fried rice, burrito etc.) and freezes beautifully!
What is Brown Rice?
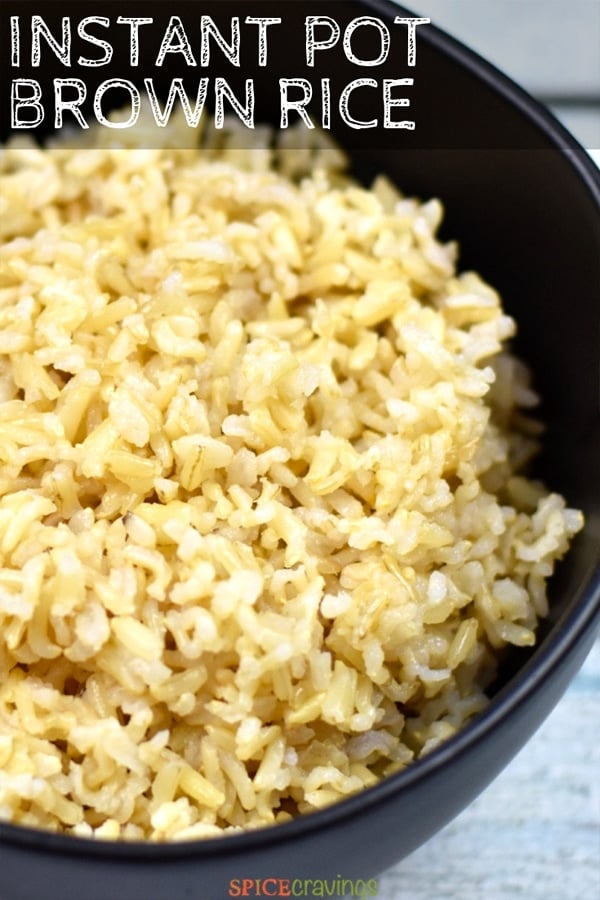
Brown rice is whole-grain rice in which the outer bran and germ layer hasn't been removed from the rice kernels. It is sometimes referred to as unpolished rice and its literal translation in Chinese is "rough rice."
Nutrition Comparison: Brown Rice vs. White Rice
Brown rice retains all the minerals, antioxidants and fiber present in the outer layers (bran and germ) due to its minimal processing. White rice, on the other hand, is refined and stripped of its outer coating.
For this reason, brown rice is considered to be a healthier and more nutritious alternative to white rice. The outer layers being intact also contribute to it's nutty and chewy texture. Let's check out the calorie and carb content of both varieties:
Calories Comparison
Although similar in calorie count, the nutritional make-up of brown rice certainly outshines white rice. For every one cup (nutritional info will vary by manufacturer):
- Brown rice is 216 calories and is a natural, rich source of essential micronutrients including magnesium, phosphorus, potassium, manganese and selenium.
- White rice is 206 calories and includes minimal amounts of iron, folate and magnesium. Keep in mind, some manufacturers make "enriched" white rice and add essential nutrients back in after processing.
Carbs Comparison
The carb count for 1 cup cooked white and brown rice is as follows:
| Carb Count | White Rice | Brown Rice |
|---|---|---|
| Total Carbs | 45g | 45g |
| Fiber | 0.6g | 3.5g |
| Net Carbs | 44.4g | 41.5g |
Result: While it still contains similar calories and carbohydrates, brown rice has more fiber, which reduces the net carbs per serving, and is richer in essential micronutrients.
Two Common Types of Long Grain Brown Rice - Jasmine & Basmati
There are two commonly available types of long-grain brown rice - Jasmine and Basmati. Although very similar in shape and size, each reigns from a different geographical region with special tasting notes.
Brown Jasmine Rice
Brown Jasmine rice is a variety of long grain rice originally grown in Thailand. It is one of the popular varieties of Asian rice due to its nutty flavor and floral aroma.
When cooked, it has a little bite to it. Sometimes called Thai Jasmine rice or Thai rice, this rice pairs very well with most Asian flavored curries, vegetables and grilled meats. My family enjoys this brand of Brown Jasmine Rice.
Brown Basmati Rice
Brown Basmati rice is the whole-grain variety of the popular nutty and aromatic Basmati rice grown in India. It is known for it's fluffy and fragrant results.
For my family, the texture of brown basmati rice took a little getting used to. Over the years, we have grown to love brown rice with all kinds of curries, lentils and vegetable dishes. My family enjoys this brand of Brown Basmati Rice.
Ingredients - Notes & Substitutions
I like to consider this a standard brown rice recipe all cooks should have in their recipe book. All it takes is four basic pantry ingredients - brown rice, liquid, salt and oil.
- Brown Rice: Use Jasmine or Basmati brown rice depending on the cuisine and type of dish you want to pair the rice with. Jasmine rice is best served with Asian dishes whereas Basmatic rice goes well with Indian curries.
- Liquid: I use water for all of my basic rice recipes for its neutral, clean flavor. Feel free to use your favorite low-sodium chicken or vegetable stock for a more savory flavor.
- Salt: I've used regular table salt in this recipe, but Kosher salt or fine sea salt can also be used here. Use whatever you have on hand. Skip it if you're using stock instead of water.
- Oil: Any mild cooking oil does the trick, such as light olive oil or avocado oil. Feel free to use coconut oil for a slight coconut flavor or ghee for a nutty, toasty flavor.
Brown Rice Recipe Ratio + Cooking Time
Everyone likes rice a certain way. That is why cooking time and the rice-to-water ratio is different for everyone, depending on whether you like a sticky texture or firm kernels.
After many experiments with cooking times and water ratios, I reached the following combination for brown rice in a 3QT and 6QT Instant Pot.
- My Preferred Recipe for Soft and Fluffy Rice:
- Ratio: 1 cup rice to 1¼ cup water
- Time: Manual (High) 22 minutes for Jasmine, 23 minutes for Basmati
- Pressure Release: NPR 5-10 works best for me. (NPR 5-10 = natural pressure release for 5-10 mins, followed by quick release of pressure)
- Customize it to your Liking:
- Firm Kernels: For more firm kernels, use 1:1 ratio of rice-to-water, Manual (High) 20 minutes, NPR 5-10.
- Softer rice: For softer rice, use 1:1.25 ratio of rice-to-water, Manual (High) 24 minutes, NPR 5-10.
Step By Step Instructions for Instant Pot Brown Rice
There are two cooking methods for brown rice in the Instant Pot - dump-and-start or pot-in-pot.
I follow the dump-and-start whenever I am solely making a side of brown rice, but the pot-in-pot allows you to cook the rice while simultaneously cooking your main meal. Follow whichever method suits your needs.
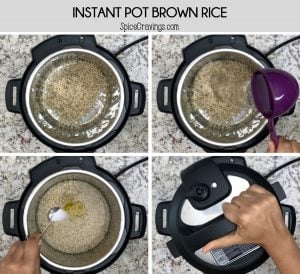
1. Dump-and-Start
- Rinse rice once and strain. Add rice, water, salt and oil to Instant Pot. Stir. Close the lid. Set the valve to 'Sealing' position. Press Manual/Pressure Cook on high for 22 minutes for Jasmine, 23 minutes for Basmati.
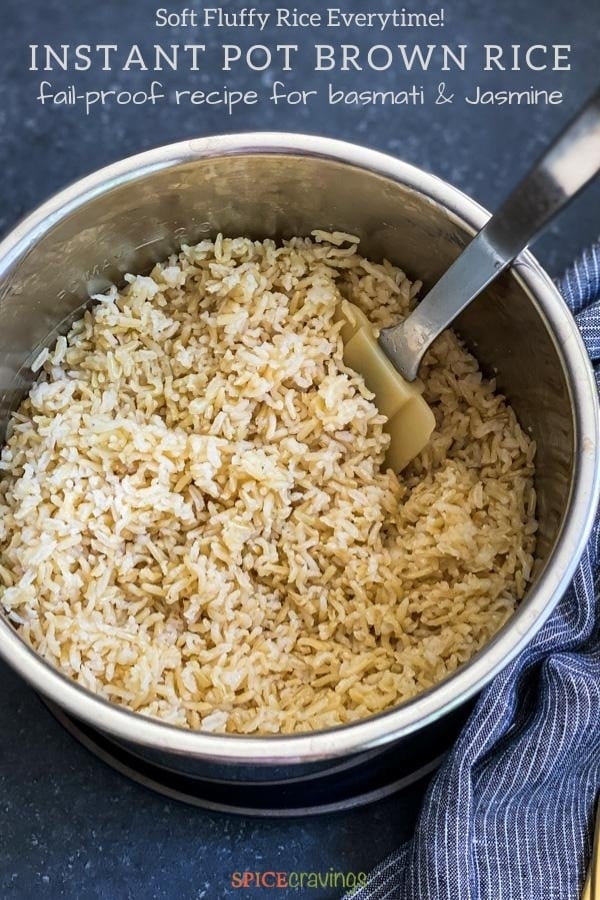
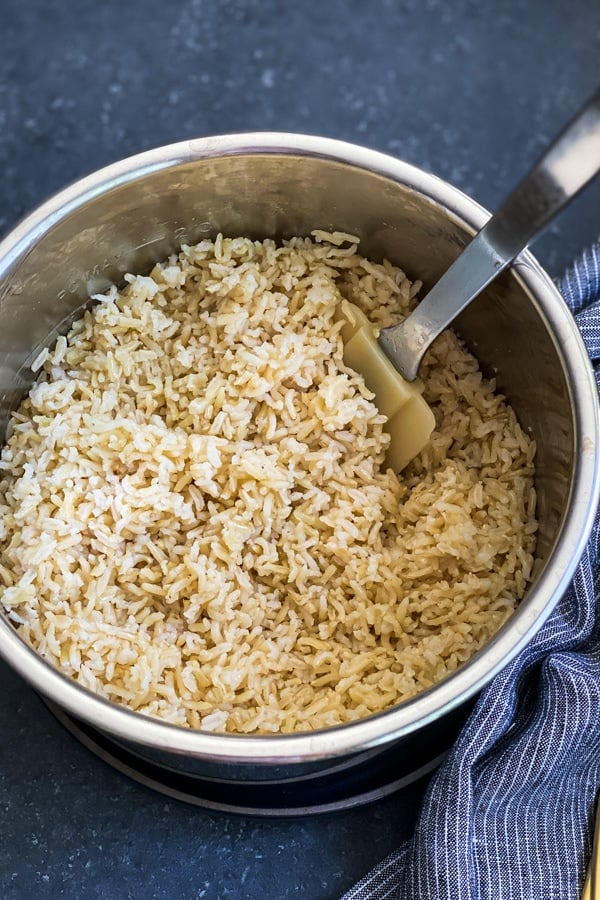
- Wait for natural pressure release (NPR) for 5-10 minutes, after which release the remaining pressure by manually by following your cooker instructions. Open lid after the pin drops. Fluff the rice gently using a fork.

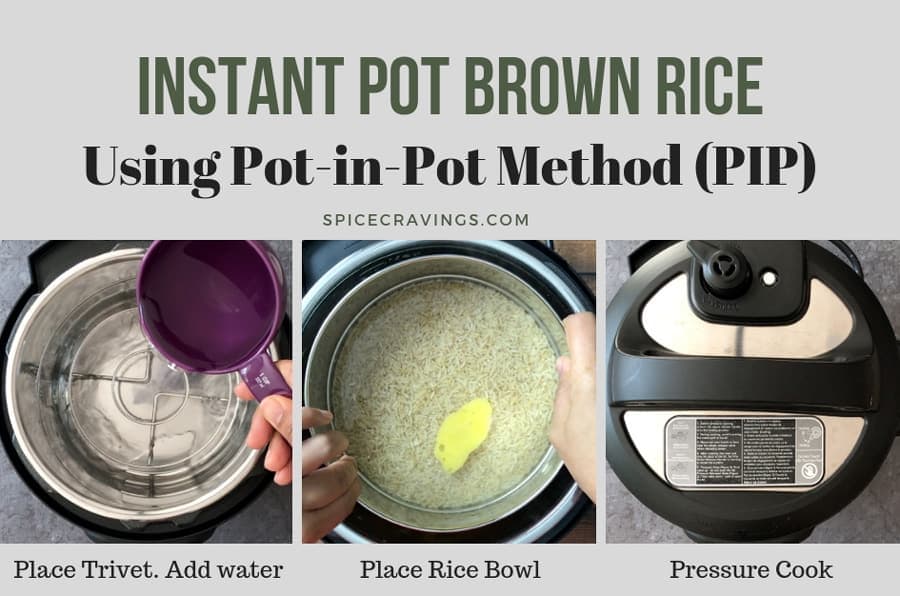
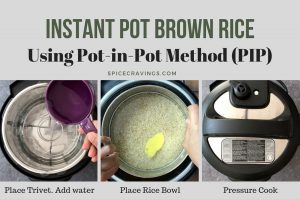
2. Pot-in-Pot
- Rinse rice once and strain. Assemble the rinsed rice, water, salt and oil in an oven-safe bowl that fits easily in your Instant Pot.
- Depending on the size of your pot, add 1-2 cups of water in the inner pot. Place a trivet. Place rice bowl on top of that. Close the lid and select Manual/Pressure Cook on high, and set 22 minutes for Jasmine, 23 minutes for Basmati (sealing mode).
- Wait for natural pressure release (NPR) for 5-10 minutes, after which release the remaining pressure by following the quick release instructions of your model. Open the lid after the pin drops. Fluff the rice gently using a fork.
Accessories needed for Pot-in-Pot Rice in Instant Pot:
- Oven Safe bowl. I use this stainless steel bowl.
- Trivet. I use the one that came with the Instant Pot, but there are many choices on amazon.
Serving Suggestions
Brown rice is a wonderful whole-grain side dish for just about any meal, but I find that the flavors of Jasmine or Basmati pair well with certain cuisines and dishes. I typically like to serve Asian or Thai with Jasmine and Indian curries with Basmati.
Brown Jasmine Rice Goes Well With:
Brown Basmati Rice Goes Well With:
Storage & Freezing Instructions
Brown rice is great for make-ahead and meal prep purposes, too. The rice will keep best stored in an airtight container in the fridge for up to 5 days.
Feel free to freeze the cooked and cooled rice in the freezer for up to 1 month. To re-heat, simply thaw overnight in the fridge, reheat on the stove or in the microwave with 1-2 Tablespoons water (to prevent the rice from drying out) and serve.
Recipe Tips & Notes:
- Choose your long-grain brown rice variety. There are two main types - Jasmine and Basmati. Jasmine works well with Asian and Thai-inspired dishes, whereas Basmati is a wonderful side for Indian curries.
- Rinse the rice. This step is essential for removing excess starches on the surface of the rice. Our goal is to make perfectly fluffy brown rice, so don't skip this step! I like to rinse mine in a fine-mesh strainer until the water runs clear.
- Follow the suggested rice-to-water ratios. The ratio is way different in the Instant Pot as compared to the stovetop method. Using the customizing tips above, use one of the following ratios: 1:1 or 1:1.25 (preferred).
- Use water or stock. Water is a great blank canvas, but stock (either chicken or vegetable) adds a touch more savoriness. If you decide to use stock, make sure it is low-sodium and skip the salt.
- Adjust the water in the inner pot based on your Instant Pot size for the Pot-in-Pot method. For 3 and 6 QT, add 1 cup. For 8 QT, add 2 cups. Note: You still have to add water to the rice bowl as per the recipe instructions.
- Use for meal prep or freeze. The rice will keep best in an airtight container in the fridge for up to 5 days. Store for up to 1 month in the freezer.
Instant Pot Brown Rice FAQ
Rinsing the rice before cooking gets rid of excess starch on the outer surface (plus, it washes away any grit or dust that may have gotten mixed in during production). This helps improve the texture of the rice, making it soft and fluffy.
Although not necessary, soaking brown rice helps to remove some of the naturally-occurring phytic acid present in grains. Studies have shown this makes it easier to digest. I do not generally soak brown rice, but its a step that comes in handy every time I make white rice.
Depending on the variety of rice, the stovetop method takes 45 minutes once the water comes to a simmer and then another 10 minutes to cool. Our Instant Pot brown rice requires half the cooking time, with the addition of pressure release. Although it still requires roughly 45 minutes from start-to-finish, there is no babysitting over a hot stove and it's virtually hands-free!
The health benefits of brown rice are largely due to its outer coating still being intact. The fiber (from the germ and bran) helps lower cholesterol, keeps you regular, fills you up and lowers the total number of net carbs.
More Rice Dishes From My Kitchen
- White Rice in Instant Pot: A fail-proof recipe for white rice in the Instant Pot, with notes on why its much easier than the stove!
- Instant Pot Mexican Rice Recipe: A recipe for restaurant-quality Mexican rice bursting with onions, peppers, corn and taco seasoning.
- Instant Pot Coconut Rice: A quick and easy recipe for aromatic Basmati or Jasmine rice cooked with creamy and rich coconut milk!
- Spinach Rice Pilaf: An easy pressure cooker and stovetop recipe for a flavorful, healthy, vegan and gluten-free side-dish speckled with spinach.
- Saffron Rice: Aromatic and nutty basmati rice simmered in a floral and fragrant saffron-infused broth prepared in the Instant Pot, stove or microwave.
- Rice Pudding (Dessert): Rich and decadent Indian rice pudding, Kheer.
📖 Recipe
Instant Pot Brown Rice (Basmati & Jasmine)
Want to save this recipe?
Video
Equipment
Ingredients
Instructions
Dump-and-Start
- Rinse rice once and strain. Add rice, water, salt and oil to Instant Pot. Stir. Close the lid. Set the valve to 'Sealing' position. Press Manual/Pressure Cook on high for 22 minutes for Jasmine, 23 minutes for Basmati.
- Wait for natural pressure release (NPR) for 5-10 minutes, after which release the remaining pressure manually by following the quick release instructions of your model. Open the lid after the pin drops. Fluff the rice gently using a fork.

Pot-In-Pot
- Rinse rice once and strain. Assemble the rinsed rice, water, salt and oil in an oven-safe bowl that fits easily in your Instant Pot.
- Depending on the size of your pot, add 1-2 cups of water in the inner pot. Place a trivet. Place rice bowl on top of that. Close the lid. Set the valve to 'Sealing' position. Press Manual/Pressure Cook on high for 22 minutes for Jasmine, 23 minutes for Basmati.
- Wait for natural pressure release (NPR) for 5-10 minutes, after which release the remaining pressure by manually by following the quick release instructions of your model. Open the lid after the pin drops. Fluff the rice gently using a fork.

Notes
- Choose your long-grain brown rice variety. There are two main types - Jasmine and Basmati. Jasmine works well with Asian and Thai-inspired dishes, whereas Basmati is a wonderful side for Indian curries.
- Rinse the rice. This step is essential for removing excess starches on the surface of the rice. Our goal is to make perfectly fluffy brown rice, so don't skip this step! I like to rinse mine in a fine-mesh strainer until the water runs clear.
- Follow the suggested rice-to-water ratios. The ratio is way different in the Instant Pot as compared to the stovetop method. Using the customizing tips above, use one of the following ratios: 1:1 or 1:1.25 (preferred).
- Use water or stock. Water is a great blank canvas, but stock (either chicken or vegetable) adds a touch more savoriness. If you decide to use stock, make sure it is low-sodium and skip the salt.
- Adjust the water in the inner pot based on your Instant Pot size for the Pot-in-Pot method. For 3 and 6 QT, add 1 cup. For 8 QT, add 2 cups. Note: You still have to add water to the rice bowl as per the recipe instructions.
- Use for meal prep or freeze. The rice will keep best in an airtight container in the fridge for up to 5 days. Store for up to 1 month in the freezer.
Nutrition
This recipe has been updated in 2020 with updated photos and process shots.


Christi says
I have used the 'Dump and Start' method with Basmati brown rice several times now and it has turned out perfect every time. Thanks so much for the simple recipe. Exactly what I was looking for.
Aneesha says
So glad you enjoy this recipe. Thanks for taking the time to rate the recipe!
brian says
brown jasmine rice from TJ's. Rinsed. 22 min at pressure. 8 min natural release. using pot in pot method for 2 cups of rice and 2.5 cups water. rice was still not totally cooked. excess water left in rice bowl. Are their needed adjustments when increasing quantities beyond 1 cup.
Aneesha says
Hi Brain, I make the same rice from TJ's every week, using the same settings and time. I'd recommend checking your sealing ring. Also, maybe the pot-in-pot bowl you're using is too big for the pot. It should have enough room all around for the steam to build up and cook evenly. I hope this helps.
Margaret says
First time using the pot in pot method and the rice was absolutely perfect...I'm never going back!
Aneesha says
Hi Margaret, That's great. Glad you enjoyed the process and the recipe 🙂
Beth says
I didn't read the instructions carefully, and did the quick (instead of natural) release after the 22 minutes. I always have trouble with the rice being either hard and crunchy or too mushy, and a lot of times water left in the pot. Even with the quick release, this was perfect!
Aneesha says
Hi Beth, That's so wonderful to hear. I make brown rice 2-3 times a week and this recipe is my go-to, glad you enjoyed it too!
Brandi says
What if we double the recipe...do we need to change the cooking time?
Aneesha says
Hi Brandi, the pressure cook times stays the same even if you multiply the recipe! Enjoy!
Fran Terhune says
Thank you....first success cooking Brown Jasmine Rice in the Instant Pot. I have used pots, rice cookers all failures! I am extatic!
aneeshasg says
Hi Fran, that is so nice to hear. I am so glad that this recipe worked for you. Thanks for sharing your experience. If you haven't already, please rate the recipe by clicking on the stars, it helps other readers spot a tried recipe. Thanks again!